The TigerPay Authorized User functionality allows students to grant parents, guardians, or other trusted individuals access to view account information and make payment on their behalf.
Authorize users receive their own login credential and should never use the student's institutional username or password.
This article provides step-by-step instructions for adding and removing Authorized Users within the TigerPay Student Account Center.
Adding an Authorized User
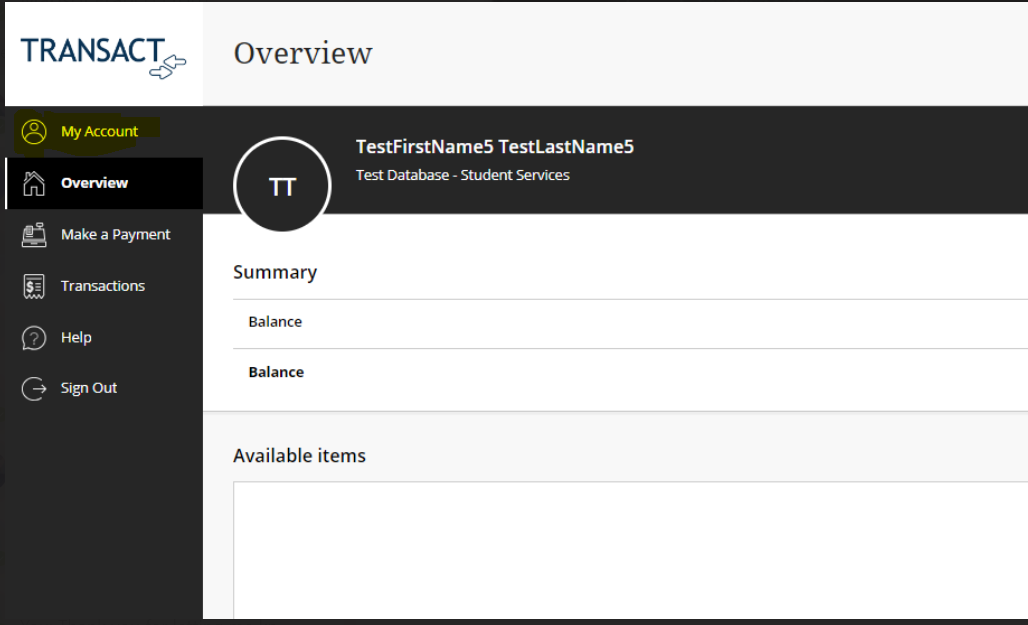
Step 1: Log into the TigerPay Student Account Center
- Log into TigerPay through MyPortal.
- From the left navigation pane, select My Account
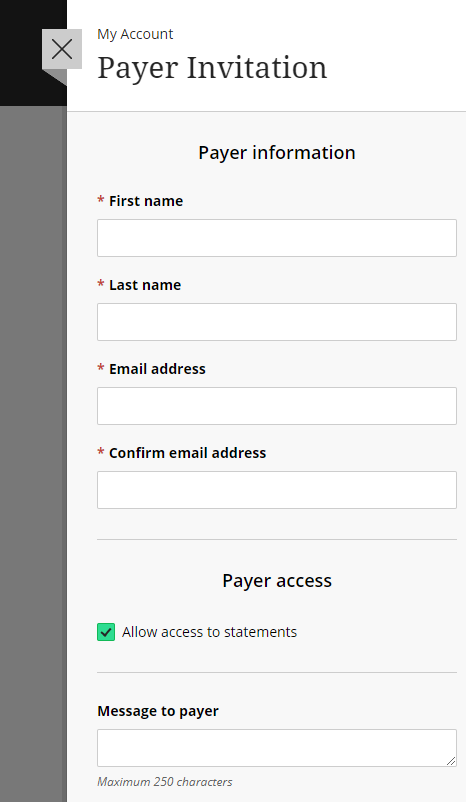
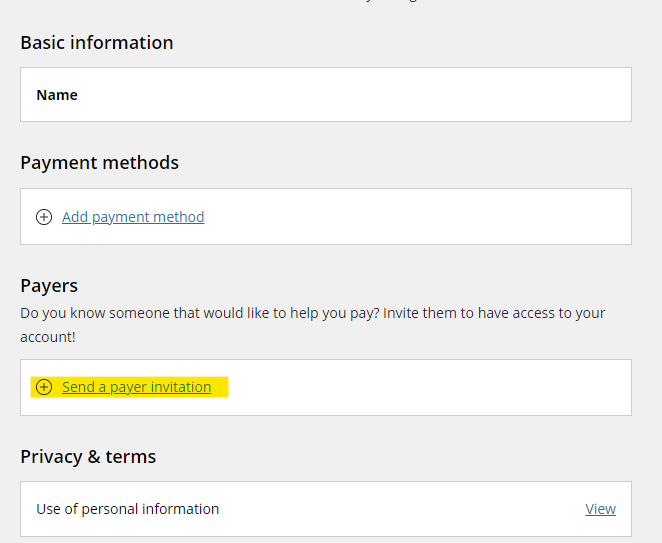
Step 2: Send a Payer Invitation
- Under the My Account section, click Send a Payer Invitation
- Enter the Authorized User's required information including:
- Full Name
- Email Address
- Review the information carefully before submitting
- Click Submit or Send Invitation
Note: ensure the Authorized User's email address is entered correctly. Once submitted, the email address cannot be changed.
Step 3: Authorized User Registration
After the invitation has been sent:
- The Authorized User will receive an email from Ellumia.
- The email contains instructions for creating their Authorized User account.
- The Authorized User must complete the registration process before access is activated.